Install maillog analyzer for Postfix because it's more useful than the one from Logwatch.
[1] Set config that let Logwatch not investigate maillog first.
[root@mail ~]#
cd /usr/share/logwatch/default.conf/logfiles
[root@mail logfiles]#
mv maillog.conf maillog.conf.bk
[root@mail logfiles]#
touch maillog.conf
[root@mail logfiles]#
/usr/sbin/logwatch
// run logwatch
Make sure there is no analyzing for maillog in the email from logwatch.
[2] Install analyzer for postfix.
[root@mail ~]#
yum -y install postfix-pflogsumm
Loading "installonlyn" plugin
Loading "fastestmirror" plugin
Setting up Install Process
Setting up repositories
base
100% |=========================| 1.1 kB 00:00
updates
100% |=========================|
951 B 00:00
addons
100% |=========================|
951 B 00:00
extras
100% |=========================| 1.1 kB 00:00
Loading mirror speeds from cached hostfile
Reading repository metadata in from local files
Parsing package install arguments
Resolving Dependencies
--> Populating transaction set with selected packages. Please wait.
---> Downloading header for postfix-pflogsumm to pack into transaction set.
postfix-pflogsumm-2.3.3-2 100% |========================| 15 kB 00:00
---> Package postfix-pflogsumm.i386 2:2.3.3-2 set to be updated
--> Running transaction check
--> Processing Dependency: perl(Date::Calc) for package: postfix-pflogsumm
--> Processing Dependency: perl-Date-Calc for package: postfix-pflogsumm
--> Restarting Dependency Resolution with new changes.
--> Populating transaction set with selected packages. Please wait.
---> Downloading header for perl-Date-Calc to pack into transaction set.
perl-Date-Calc-5.4-1.2.2. 100% |=========================| 9.7 kB 00:00
---> Package perl-Date-Calc.x86_64 0:5.4-1.2.2.1 set to be updated
--> Running transaction check
--> Processing Dependency: perl(Bit::Vector) for package: perl-Date-Calc
--> Processing Dependency: perl(Carp::Clan) for package: perl-Date-Calc
--> Processing Dependency: perl-Bit-Vector >= 6.4 for package: perl-Date-Calc
--> Restarting Dependency Resolution with new changes.
--> Populating transaction set with selected packages. Please wait.
---> Downloading header for perl-Bit-Vector to pack into transaction set.
perl-Bit-Vector-6.4-2.2.2 100% |=========================| 6.9 kB 00:00
---> Package perl-Bit-Vector.x86_64 0:6.4-2.2.2.1 set to be updated
---> Downloading header for perl-Carp-Clan to pack into transaction set.
perl-Carp-Clan-5.3-1.2.1. 100% |=========================| 3.2 kB 00:00
---> Package perl-Carp-Clan.noarch 0:5.3-1.2.1 set to be updated
--> Running transaction check
Dependencies Resolved
================================================== =========
Package
Arch
Version
Repository
Size
================================================== =========
Installing:
postfix-pflogsumm
i386
2:2.3.3-2
base
49 k
Installing for dependencies:
perl-Bit-Vector
i386
6.4-2.2.2.1
base
182 k
perl-Carp-Clan
noarch
5.3-1.2.1
base
22 k
perl-Date-Calc
i386
5.4-1.2.2.1
base
271 k
Transaction Summary
================================================== =========
Install
4 Package(s)
Update
0 Package(s)
Remove
0 Package(s)
Total download size: 524 k
Downloading Packages:
(1/4): perl-Date-Calc-5.4
100% |====================| 271 kB 00:00
(2/4): perl-Bit-Vector-6.
100% |====================| 182 kB 00:00
(3/4): postfix-pflogsumm-
100% |====================|
49 kB 00:00
(4/4): perl-Carp-Clan-5.3
100% |====================|
22 kB 00:00
Running Transaction Test
Finished Transaction Test
Transaction Test Succeeded
Running Transaction
Installing: perl-Carp-Clan
################################# [1/4]
Installing: perl-Date-Calc
################################# [2/4]
Installing: perl-Bit-Vector
################################# [3/4]
Installing: postfix-pflogsumm
################################# [4/4]
Installed: postfix-pflogsumm.i386 2:2.3.3-2
Dependency Installed: perl-Bit-Vector.i386 0:6.4-2.2.2.1 perl-Carp-Clan.noarch 0:5.3-1.2.1 perl-Date-Calc.i386 0:5.4-1.2.2.1
Complete!
// display summary of yesterday's maillogs
[root@mail ~]#
perl /usr/sbin/pflogsumm -d yesterday /var/log/maillog
Postfix log summaries for May 21
Grand Totals
------------
messages
2 received
2 delivered
0 forwarded
0 deferred
0 bounced
2 rejected (50%)
0 reject warnings
0 held
0 discarded (0%)
14379 bytes received
14379 bytes delivered
1 senders
1 sending hosts/domains
2 recipients
1 recipient hosts/domains
Per-Hour Traffic Summary
time
received
delivered
deferred
bounced
rejected
-------------------------------------------------------------------------------------------
0000-0100
0
0
0
0
0
0100-0200
0
0
0
0
0
0200-0300
0
0
0
0
0
0300-0400
0
0
0
0
0
0400-0500
0
0
0
0
0
0500-0600
2
2
0
0
0
0600-0700
0
0
0
0
0
0700-0800
0
0
0
0
0
0800-0900
0
0
0
0
0
0900-1000
0
0
0
0
1
1000-1100
0
0
0
0
0
1100-1200
0
0
0
0
0
1200-1300
0
0
0
0
0
1300-1400
0
0
0
0
0
1400-1500
0
0
0
0
0
1500-1600
0
0
0
0
0
1600-1700
0
0
0
0
1
1700-1800
0
0
0
0
0
1800-1900
0
0
0
0
0
1900-2000
0
0
0
0
0
2000-2100
0
0
0
0
0
2100-2200
0
0
0
0
0
2200-2300
0
0
0
0
0
2300-2400
0
0
0
0
0
Host/Domain Summary: Message Delivery
sent cnt
bytes
defers
avg dly
max dly
host/domain
--------
-------
-------
-------
-------
-----------
2
14379
0
2.1 s
4.1 s
server-linux.info
Host/Domain Summary: Messages Received
msg cnt
bytes
host/domain
--------
-------
-----------
2
14379
server-linux.info
Senders by message count
------------------------
2 root@server-linux.info
Recipients by message count
---------------------------
1 cent@server-linux.info
1 root@server-linux.info
Senders by message size
-----------------------
14379 root@server-linux.info
Recipients by message size
--------------------------
7214 cent@server-linux.info
7165 root@server-linux.info
message deferral detail: none
message bounce detail (by relay): none
message reject detail
---------------------
RCPT
Recipient address rejected: Access denied (total: 2)
1 all9988@gmail.com
1 candy59839@yahoo.com.tw
message reject warning detail: none
message hold detail: none
message discard detail: none
smtp delivery failures: none
Warnings: none
Fatal Errors: none
Panics: none
Master daemon messages: none
[root@mail ~]#
crontab -e
// send summary of maillog at AM 1:00 everyday to root
00 01 * * * perl /usr/sbin/pflogsumm -e -d yesterday /var/log/maillog | mail -s 'Logwatch for Postfix' root
9/27/2010
9/21/2010
Configure SSL Apache
Configure for SSL that is installed in section (1). I made a Certification File for SSL by myself in this example, but if you use server for bussiness, It's better to buy and use a Certification File from CA like verisign.com.
[root@www ~]#
cd /etc/pki/tls/certs
[root@www certs]#
make server.key
umask 77 ; \
/usr/bin/openssl genrsa -des3 1024 > server.key
Generating RSA private key, 1024 bit long modulus
.................................................. ....++++++
.............++++++
e is 61251 (0x10001)
Enter pass phrase:
// input pass phrase
Verifying - Enter pass phrase:
// verify
[root@www certs]#
// it's troublesome to input pass phrase always, so remove it from private key
[root@www certs]#
openssl rsa -in server.key -out server.key
Enter pass phrase for server.key:
// input pass phrase
writing RSA key
[root@www certs]#
[root@www certs]#
make server.csr
umask 77 ; \
/usr/bin/openssl req -utf8 -new -key server.key -out server.csr
You are about to be asked to enter information that will be incorporated
into your certificate request.
What you are about to enter is what is called a Distinguished Name or a DN.
There are quite a few fields but you can leave some blank
For some fields there will be a default value,
If you enter '.', the field will be left blank.
-----
Country Name (2 letter code) [GB]:
JP
State or Province Name (full name) [Berkshire]:
Hiroshima
Locality Name (eg, city) [Newbury]:
Hiroshima
Organization Name (eg, company) [My Company Ltd]:
Server Linux
Organizational Unit Name (eg, section) []:
IT Solution
Common Name (eg, your server's hostname) []:
www.server-linux.info
Email Address []:
root@server-linux.info
Please enter the following 'extra' attributes
to be sent with your certificate request
A challenge password []:
// Enter with empty
An optional company name []:
// Enter with empty
[root@www certs]#
[root@www certs]#
openssl x509 -in server.csr -out server.crt -req -signkey server.key -days 3650
// make CertificateFile
Signature ok
subject=/C=JP/ST=Hiroshima/L=Hiroshima/O=Server Linux/OU=IT Solution/CN=www.server-linux.info/emailAddress=root@server-linux.info Getting Private key
[root@www certs]#
chmod 400 server.*
[root@www certs]#
[root@www certs]#
vi /etc/httpd/conf.d/ssl.conf
DocumentRoot "/var/www/html"
// line 84: make valid
ServerName
www.server-linux.info:443
// line 85: make valid and change
SSLCertificateFile
/etc/pki/tls/certs/server.crt
// line 112: change
SSLCertificateKeyFile
/etc/pki/tls/certs/server.key
// line 119: change
[root@www certs]#
/etc/rc.d/init.d/httpd restart
Stopping httpd:
[ OK ]
Starting httpd:
[ OK ]
Access to the page that is made in section (2) with https. Following window is shown because Certification File is not by CA. Click Ok to proceed.
Completed to access. However, I think this is not so useful because always warning window is shown and visitors can not easily trust the server.
[root@www ~]#
cd /etc/pki/tls/certs
[root@www certs]#
make server.key
umask 77 ; \
/usr/bin/openssl genrsa -des3 1024 > server.key
Generating RSA private key, 1024 bit long modulus
.................................................. ....++++++
.............++++++
e is 61251 (0x10001)
Enter pass phrase:
// input pass phrase
Verifying - Enter pass phrase:
// verify
[root@www certs]#
// it's troublesome to input pass phrase always, so remove it from private key
[root@www certs]#
openssl rsa -in server.key -out server.key
Enter pass phrase for server.key:
// input pass phrase
writing RSA key
[root@www certs]#
[root@www certs]#
make server.csr
umask 77 ; \
/usr/bin/openssl req -utf8 -new -key server.key -out server.csr
You are about to be asked to enter information that will be incorporated
into your certificate request.
What you are about to enter is what is called a Distinguished Name or a DN.
There are quite a few fields but you can leave some blank
For some fields there will be a default value,
If you enter '.', the field will be left blank.
-----
Country Name (2 letter code) [GB]:
JP
State or Province Name (full name) [Berkshire]:
Hiroshima
Locality Name (eg, city) [Newbury]:
Hiroshima
Organization Name (eg, company) [My Company Ltd]:
Server Linux
Organizational Unit Name (eg, section) []:
IT Solution
Common Name (eg, your server's hostname) []:
www.server-linux.info
Email Address []:
root@server-linux.info
Please enter the following 'extra' attributes
to be sent with your certificate request
A challenge password []:
// Enter with empty
An optional company name []:
// Enter with empty
[root@www certs]#
[root@www certs]#
openssl x509 -in server.csr -out server.crt -req -signkey server.key -days 3650
// make CertificateFile
Signature ok
subject=/C=JP/ST=Hiroshima/L=Hiroshima/O=Server Linux/OU=IT Solution/CN=www.server-linux.info/emailAddress=root@server-linux.info Getting Private key
[root@www certs]#
chmod 400 server.*
[root@www certs]#
[root@www certs]#
vi /etc/httpd/conf.d/ssl.conf
DocumentRoot "/var/www/html"
// line 84: make valid
ServerName
www.server-linux.info:443
// line 85: make valid and change
SSLCertificateFile
/etc/pki/tls/certs/server.crt
// line 112: change
SSLCertificateKeyFile
/etc/pki/tls/certs/server.key
// line 119: change
[root@www certs]#
/etc/rc.d/init.d/httpd restart
Stopping httpd:
[ OK ]
Starting httpd:
[ OK ]
Access to the page that is made in section (2) with https. Following window is shown because Certification File is not by CA. Click Ok to proceed.
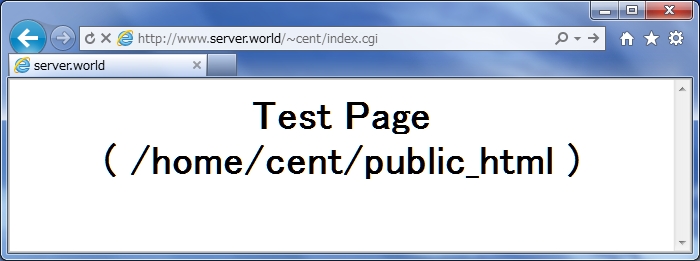 |
| Image test |
Completed to access. However, I think this is not so useful because always warning window is shown and visitors can not easily trust the server.
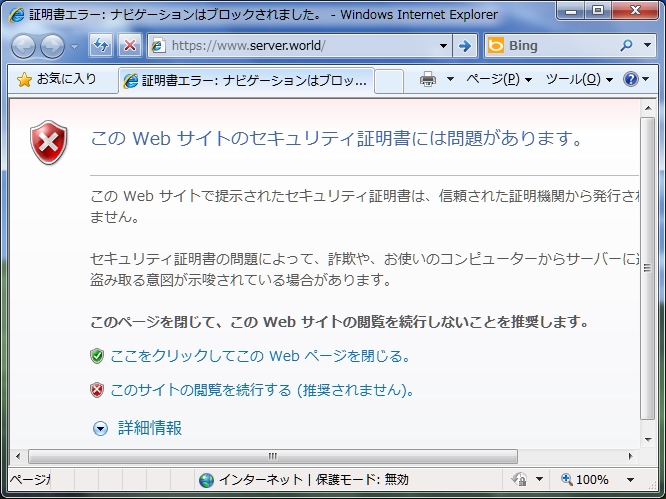 |
| Image test https |
Config Apache
Here is an example to configure Apache. I set it that users can open to the public their Web site and can execute CGI in any directories. ( SSI is disabled because it's not used so often )
[root@www ~]#
vi /etc/httpd/conf/httpd.conf
ServerTokens
Prod
// line 44: change
KeepAlive
On
// line 74: change to ON
ServerAdmin
root@server-linux.info
// line 250: Admin's address
ServerName
www.server-linux.info:80
// line 264: server's name
Options FollowSymLinks
ExecCGI
// line 319: change (disable Indexes)
AllowOverride
All
// line 326: change
#
UserDir disable
// line 354: make it comment
UserDir public_html
// line 361: make valid
// line 369 - 380 : remove # and make valid
AllowOverride
All
// change
Options
ExecCGI
// CGI enabled
Order allow,deny
Allow from all
Order deny,allow
Deny from all
// line 390: add file name that it can access only with directory's name
DirectoryIndex index.html
index.cgi index.php
ServerSignature
Off
// line 523: change
#
AddDefaultCharset UTF-8
// line 746: make it comment
// line 777: make valid and add file-type that apache looks them CGI
AddHandler cgi-script .cgi
.pl
[root@www ~]#
/etc/rc.d/init.d/httpd start
Starting httpd:
[ OK ]
[root@www ~]#
chkconfig httpd on
Make HTML test page and Make sure apache is working. It's OK if following page is shown.
[root@www ~]#
cd /var/www/html
[root@www html]#
vi index.html
Test Page
Make CGI test page and Make sure apache is working. It's OK if following page is shown.
[root@www ~]#
cd /var/www/html
[root@www html]#
vi index.cgi
#!/usr/local/bin/perl
print "Content-type: text/html\n\n";
print <<"EOM";
CGI Test Page
[root@www ~]#
chmod 705 index.cgi
Make PHP test page and Make sure apache is working. It's OK if following page is shown.
[root@www ~]#
cd /var/www/html
[root@www html]#
vi index.php
print Date("Y/m/d");
?>
[root@www ~]#
vi /etc/httpd/conf/httpd.conf
ServerTokens
Prod
// line 44: change
KeepAlive
On
// line 74: change to ON
ServerAdmin
root@server-linux.info
// line 250: Admin's address
ServerName
www.server-linux.info:80
// line 264: server's name
Options FollowSymLinks
ExecCGI
// line 319: change (disable Indexes)
AllowOverride
All
// line 326: change
#
UserDir disable
// line 354: make it comment
UserDir public_html
// line 361: make valid
// line 369 - 380 : remove # and make valid
AllowOverride
All
// change
Options
ExecCGI
// CGI enabled
Order allow,deny
Allow from all
Order deny,allow
Deny from all
// line 390: add file name that it can access only with directory's name
DirectoryIndex index.html
index.cgi index.php
ServerSignature
Off
// line 523: change
#
AddDefaultCharset UTF-8
// line 746: make it comment
// line 777: make valid and add file-type that apache looks them CGI
AddHandler cgi-script .cgi
.pl
[root@www ~]#
/etc/rc.d/init.d/httpd start
Starting httpd:
[ OK ]
[root@www ~]#
chkconfig httpd on
Make HTML test page and Make sure apache is working. It's OK if following page is shown.
[root@www ~]#
cd /var/www/html
[root@www html]#
vi index.html
Test Page
Make CGI test page and Make sure apache is working. It's OK if following page is shown.
[root@www ~]#
cd /var/www/html
[root@www html]#
vi index.cgi
#!/usr/local/bin/perl
print "Content-type: text/html\n\n";
print <<"EOM";
CGI Test Page
[root@www ~]#
chmod 705 index.cgi
Make PHP test page and Make sure apache is working. It's OK if following page is shown.
[root@www ~]#
cd /var/www/html
[root@www html]#
vi index.php
print Date("Y/m/d");
?>
RHEL / CentOS Support 4GB or more RAM ( memory )
Run command:
# uname -r
2.6.18-8.1.3.el5
Run command:
# yum info kernel-PAE
Available Packages
Name : kernel-PAE
Summary: The Linux kernel compiled for PAE capable machines.
Description:
This package includes a version of the Linux kernel with support for up to
64GB of high memory. It requires a CPU with Physical Address Extensions (PAE).
The non-PAE kernel can only address up to 4GB of memory.
Install the kernel-PAE package if your machine has more than 4GB of memory.
# yum install kernel-PAE
Loading “installonlyn” plugin
Setting up Install Process
Setting up repositories
Reading repository metadata in from local files
Parsing package install arguments
Resolving Dependencies
–> Populating transaction set with selected packages. Please wait.
—> Downloading header for kernel-PAE to pack into transaction set.
kernel-PAE-2.6.18-8.1.15. 100% |=========================| 207 kB 00:00
—> Package kernel-PAE.i686 0:2.6.18-8.1.15.el5 set to be installed
–> Running transaction check
Dependencies Resolved
================================================== ===========================
Package Arch Version Repository Size
================================================== ===========================
Installing:
kernel-PAE i686 2.6.18-8.1.15.el5 updates 12 M
Transaction Summary
================================================== ===========================
Install 1 Package(s)
Update 0 Package(s)
Remove 0 Package(s)
Total download size: 12 M
Is this ok [y/N]: y
Downloading Packages:
(1/1): kernel-PAE-2.6.18- 100% |=========================| 12 MB 00:12
Running Transaction Test
Finished Transaction Test
Transaction Test Succeeded
Running Transaction
Installing: kernel-PAE ######################### [1/1]
Installed: kernel-PAE.i686 0:2.6.18-8.1.15.el5
Complete!
Note
After install kernel PA. We config file /etc/grub.conf
#vi /etc/grub.conf
# grub.conf generated by anaconda
#
# Note that you do not have to rerun grub after making changes to this file
# NOTICE: You have a /boot partition. This means that
# all kernel and initrd paths are relative to /boot/, eg.
# root (hd0,0)
# kernel /vmlinuz-version ro root=/dev/sda3
# initrd /initrd-version.img
#boot=/dev/sda
default=0
timeout=5
splashimage=(hd0,0)/grub/splash.xpm.gz
hiddenmenu
title CentOS (2.6.18-128.1.16.el5PAE)
root (hd0,0)
kernel /vmlinuz-2.6.18-128.1.16.el5PAE ro root=LABEL=/ rhgb quiet
initrd /initrd-2.6.18-128.1.16.el5PAE.img
title CentOS (2.6.18-128.1.14.el5)
root (hd0,0)
kernel /vmlinuz-2.6.18-128.1.14.el5 ro root=LABEL=/ rhgb quiet
initrd /initrd-2.6.18-128.1.14.el5.img
title CentOS (2.6.18-53.el5)
root (hd0,0)
kernel /vmlinuz-2.6.18-53.el5 ro root=LABEL=/ rhgb quiet
initrd /initrd-2.6.18-53.el5.img
9/15/2010
Configure Rsync to copy files
Following example based on a environment HostA is [192.168.1.18], HostB is [192.168.1.20].
1. Install xinetd first. It's necessary on HostA.
[root@vnlamp ~]#yum -y install xinetd
[root@vnlamp ~]#vi /etc/xinetd.d/rsync
# default: off
# description: The rsync server is a good addition to an ftp server, as it \
# allows crc checksumming etc.
service rsync
{
disable = no // change
socket_type = stream
wait = no
user = root
server = /usr/bin/rsync
server_args = --daemon
log_on_failure += USERID
}
[root@vnlamp ~]#/etc/rc.d/init.d/xinetd start
[root@vnlamp ~]#chkconfig xinetd on
2. Config for HostA.
[root@vnlamp ~]#vi /etc/rsyncd.conf
[site] // name
path = /var/www/html // copied directory
hosts deny = *
list = true
uid = root
gid = root
3. Config for HostB.
[root@vnlamp-test ~]#vi /etc/rsync_exclude.lst
// Write directory or files you don't want to copy.
test
test.txt
4. Run Rsync.
[root@vnlamp-test ~]# rsync -avz --delete --exclude-from=/etc/rsync_exclude.lst 192.168.1.18::site /home/backup
// add in cron if you'd like to run rsync.
9/11/2010
How To Install memcached with memcache PHP Extension on CentOS
In this how to i will describe how to install memcached on your server with PHP Extension. memcached is a high-performance, distributed memory object caching system, generic in nature, but intended for use in speeding up dynamic web applications by alleviating database load. My server is running CentOS 5.3 with CPanel.
1) Install memcached.
Enable rpmforge respository to install latest memcached rpm using yum.
For i386 / i686
rpm -Uhv http://apt.sw.be/redhat/el5/en/i386/...l5.rf.i386.rpm
For x86_64
rpm -Uhv http://apt.sw.be/redhat/el5/en/x86_6....rf.x86_64.rpm
Use yum to install memcached
yum -y install memcached
As soon as memcached installation completed, edit options for memcached in /etc/sysconfig/memcached to meet your need.
vi /etc/sysconfig/memcached
PORT=”11211″ #define on which port to urn
USER=”nobody” #same as apache user
MAXCONN=”1024″ #maximum number of connections allowed
CACHESIZE=”64″ #memory used for caching
OPTIONS=”" #use for any custom options
Save the file. All options can be seen by using following command
memcached -h
Start memcached
/etc/init.d/memcached start
Starting Distributed memory caching (memcached): [ OK ]
to check the running status of memcached
/etc/init.d/memcached status
memcached (pid 6475) is running…
and
netstat -anp | grep 11211
tcp 0 0 :::11211 :::* LISTEN 6475/memcached
udp 0 0 0.0.0.0:11211 0.0.0.0:* 6475/memcached
2) Install PHP Extension.
Download and install latest stable memcache version from PECL.
cd /usr/src
wget http://pecl.php.net/get/memcache-2.2.5.tgz
tar zxvf memcache-2.2.5.tgz
cd memcache-2.2.5
phpize
./configure
make
make install
memcache.so will be install in php modules directory, now enable memcache.so extension in php.ini
To find out your php.ini location, execute following command
php -i | grep php.ini
Configuration File (php.ini) Path => /usr/local/lib
Loaded Configuration File => /usr/local/lib/php.ini
vi /usr/local/lib/php.ini
extension = “memcache.so”
save the file and restart httpd server.
/etc/init.d/httpd restart
To check is memcache extension loaded in php, execute following command.
php -i | grep memcache
memcache
memcache support => enabled
memcache.allow_failover => 1 => 1
memcache.chunk_size => 8192 => 8192
memcache.default_port => 11211 => 11211
memcache.default_timeout_ms => 1000 => 1000
memcache.hash_function => crc32 => crc32
memcache.hash_strategy => standard => standard
memcache.max_failover_attempts => 20 => 20
Registered save handlers => files user sqlite memcache
PWD => /usr/src/memcache-2.2.5
_SERVER["PWD"] => /usr/src/memcache-2.2.5
_ENV["PWD"] => /usr/src/memcache-2.2.5
DDoS Protection Script For iptables !
#!/bin/sh
#------------------------------------------------------------------------------
#
# File: SIG-antiDDoS.sh
#
# Compiler: Ruslan Abuzant
# PS> Collected From Lots Of Sources
# PS> Credits: Real Authors (no idea)
#
# URL: http://www.liteforex.org/
#
# License: GNU GPL (version 2, or any later version).
#
# Configuration.
#------------------------------------------------------------------------------
# For debugging use iptables -v.
IPTABLES="/sbin/iptables"
IP6TABLES="/sbin/ip6tables"
MODPROBE="/sbin/modprobe"
RMMOD="/sbin/rmmod"
ARP="/usr/sbin/arp"
# Logging options.
#------------------------------------------------------------------------------
LOG="LOG --log-level debug --log-tcp-sequence --log-tcp-options"
LOG="$LOG --log-ip-options"
# Defaults for rate limiting
#------------------------------------------------------------------------------
RLIMIT="-m limit --limit 3/s --limit-burst 8"
# Unprivileged ports.
#------------------------------------------------------------------------------
PHIGH="1024:65535"
PSSH="1000:1023"
# Load required kernel modules
#------------------------------------------------------------------------------
$MODPROBE ip_conntrack_ftp
$MODPROBE ip_conntrack_irc
# Mitigate ARP spoofing/poisoning and similar attacks.
#------------------------------------------------------------------------------
# Hardcode static ARP cache entries here
# $ARP -s IP-ADDRESS MAC-ADDRESS
# Kernel configuration.
#------------------------------------------------------------------------------
# Disable IP forwarding.
# On => Off = (reset)
echo 1 > /proc/sys/net/ipv4/ip_forward
echo 0 > /proc/sys/net/ipv4/ip_forward
# Enable IP spoofing protection
for i in /proc/sys/net/ipv4/conf/*/rp_filter; do echo 1 > $i; done
# Protect against SYN flood attacks
echo 1 > /proc/sys/net/ipv4/tcp_syncookies
# Ignore all incoming ICMP echo requests
echo 0 > /proc/sys/net/ipv4/icmp_echo_ignore_all
# Ignore ICMP echo requests to broadcast
echo 1 > /proc/sys/net/ipv4/icmp_echo_ignore_broadcasts
# Log packets with impossible addresses.
for i in /proc/sys/net/ipv4/conf/*/log_martians; do echo 1 > $i; done
# Don't log invalid responses to broadcast
echo 1 > /proc/sys/net/ipv4/icmp_ignore_bogus_error_responses
# Don't accept or send ICMP redirects.
for i in /proc/sys/net/ipv4/conf/*/accept_redirects; do echo 0 > $i; done
for i in /proc/sys/net/ipv4/conf/*/send_redirects; do echo 0 > $i; done
# Don't accept source routed packets.
for i in /proc/sys/net/ipv4/conf/*/accept_source_route; do echo 0 > $i; done
# Disable multicast routing
for i in /proc/sys/net/ipv4/conf/*/mc_forwarding; do echo 0 > $i; done
# Disable proxy_arp.
for i in /proc/sys/net/ipv4/conf/*/proxy_arp; do echo 0 > $i; done
# Enable secure redirects, i.e. only accept ICMP redirects for gateways
# Helps against MITM attacks.
for i in /proc/sys/net/ipv4/conf/*/secure_redirects; do echo 1 > $i; done
# Disable bootp_relay
for i in /proc/sys/net/ipv4/conf/*/bootp_relay; do echo 0 > $i; done
# Default policies.
#------------------------------------------------------------------------------
# Drop everything by default.
$IPTABLES -P INPUT DROP
$IPTABLES -P FORWARD DROP
$IPTABLES -P OUTPUT DROP
# Set the nat/mangle/raw tables' chains to ACCEPT
$IPTABLES -t nat -P PREROUTING ACCEPT
$IPTABLES -t nat -P OUTPUT ACCEPT
$IPTABLES -t nat -P POSTROUTING ACCEPT
$IPTABLES -t mangle -P PREROUTING ACCEPT
$IPTABLES -t mangle -P INPUT ACCEPT
$IPTABLES -t mangle -P FORWARD ACCEPT
$IPTABLES -t mangle -P OUTPUT ACCEPT
$IPTABLES -t mangle -P POSTROUTING ACCEPT
# Cleanup.
#------------------------------------------------------------------------------
# Delete all
$IPTABLES -F
$IPTABLES -t nat -F
$IPTABLES -t mangle -F
# Delete all
$IPTABLES -X
$IPTABLES -t nat -X
$IPTABLES -t mangle -X
# Zero all packets and counters.
$IPTABLES -Z
$IPTABLES -t nat -Z
$IPTABLES -t mangle -Z
# Completely disable IPv6.
#------------------------------------------------------------------------------
# Block all IPv6 traffic
# If the ip6tables command is available, try to block all IPv6 traffic.
if test -x $IP6TABLES; then
# Set the default policies
# drop everything
$IP6TABLES -P INPUT DROP 2>/dev/null
$IP6TABLES -P FORWARD DROP 2>/dev/null
$IP6TABLES -P OUTPUT DROP 2>/dev/null
# The mangle table can pass everything
$IP6TABLES -t mangle -P PREROUTING ACCEPT 2>/dev/null
$IP6TABLES -t mangle -P INPUT ACCEPT 2>/dev/null
$IP6TABLES -t mangle -P FORWARD ACCEPT 2>/dev/null
$IP6TABLES -t mangle -P OUTPUT ACCEPT 2>/dev/null
$IP6TABLES -t mangle -P POSTROUTING ACCEPT 2>/dev/null
# Delete all rules.
$IP6TABLES -F 2>/dev/null
$IP6TABLES -t mangle -F 2>/dev/null
# Delete all chains.
$IP6TABLES -X 2>/dev/null
$IP6TABLES -t mangle -X 2>/dev/null
# Zero all packets and counters.
$IP6TABLES -Z 2>/dev/null
$IP6TABLES -t mangle -Z 2>/dev/null
fi
# Custom user-defined chains.
#------------------------------------------------------------------------------
# LOG packets, then ACCEPT.
$IPTABLES -N ACCEPTLOG
$IPTABLES -A ACCEPTLOG -j $LOG $RLIMIT --log-prefix "ACCEPT "
$IPTABLES -A ACCEPTLOG -j ACCEPT
# LOG packets, then DROP.
$IPTABLES -N DROPLOG
$IPTABLES -A DROPLOG -j $LOG $RLIMIT --log-prefix "DROP "
$IPTABLES -A DROPLOG -j DROP
# LOG packets, then REJECT.
# TCP packets are rejected with a TCP reset.
$IPTABLES -N REJECTLOG
$IPTABLES -A REJECTLOG -j $LOG $RLIMIT --log-prefix "REJECT "
$IPTABLES -A REJECTLOG -p tcp -j REJECT --reject-with tcp-reset
$IPTABLES -A REJECTLOG -j REJECT
# Only allows RELATED ICMP types
# (destination-unreachable, time-exceeded, and parameter-problem).
# TODO: Rate-limit this traffic?
# TODO: Allow fragmentation-needed?
# TODO: Test.
$IPTABLES -N RELATED_ICMP
$IPTABLES -A RELATED_ICMP -p icmp --icmp-type destination-unreachable -j ACCEPT
$IPTABLES -A RELATED_ICMP -p icmp --icmp-type time-exceeded -j ACCEPT
$IPTABLES -A RELATED_ICMP -p icmp --icmp-type parameter-problem -j ACCEPT
$IPTABLES -A RELATED_ICMP -j DROPLOG
# Make It Even Harder To Multi-PING
$IPTABLES -A INPUT -p icmp -m limit --limit 1/s --limit-burst 2 -j ACCEPT
$IPTABLES -A INPUT -p icmp -m limit --limit 1/s --limit-burst 2 -j LOG --log-prefix PING-DROP:
$IPTABLES -A INPUT -p icmp -j DROP
$IPTABLES -A OUTPUT -p icmp -j ACCEPT
# Only allow the minimally required/recommended parts of ICMP. Block the rest.
#------------------------------------------------------------------------------
# TODO: This section needs a lot of testing!
# First, drop all fragmented ICMP packets (almost always malicious).
$IPTABLES -A INPUT -p icmp --fragment -j DROPLOG
$IPTABLES -A OUTPUT -p icmp --fragment -j DROPLOG
$IPTABLES -A FORWARD -p icmp --fragment -j DROPLOG
# Allow all ESTABLISHED ICMP traffic.
$IPTABLES -A INPUT -p icmp -m state --state ESTABLISHED -j ACCEPT $RLIMIT
$IPTABLES -A OUTPUT -p icmp -m state --state ESTABLISHED -j ACCEPT $RLIMIT
# Allow some parts of the RELATED ICMP traffic, block the rest.
$IPTABLES -A INPUT -p icmp -m state --state RELATED -j RELATED_ICMP $RLIMIT
$IPTABLES -A OUTPUT -p icmp -m state --state RELATED -j RELATED_ICMP $RLIMIT
# Allow incoming ICMP echo requests (ping), but only rate-limited.
$IPTABLES -A INPUT -p icmp --icmp-type echo-request -j ACCEPT $RLIMIT
# Allow outgoing ICMP echo requests (ping), but only rate-limited.
$IPTABLES -A OUTPUT -p icmp --icmp-type echo-request -j ACCEPT $RLIMIT
# Drop any other ICMP traffic.
$IPTABLES -A INPUT -p icmp -j DROPLOG
$IPTABLES -A OUTPUT -p icmp -j DROPLOG
$IPTABLES -A FORWARD -p icmp -j DROPLOG
# Selectively allow certain special types of traffic.
#------------------------------------------------------------------------------
# Allow loopback interface to do anything.
$IPTABLES -A INPUT -i lo -j ACCEPT
$IPTABLES -A OUTPUT -o lo -j ACCEPT
# Allow incoming connections related to existing allowed connections.
$IPTABLES -A INPUT -m state --state ESTABLISHED,RELATED -j ACCEPT
# Allow outgoing connections EXCEPT invalid
$IPTABLES -A OUTPUT -m state --state NEW,ESTABLISHED,RELATED -j ACCEPT
# Miscellaneous.
#------------------------------------------------------------------------------
# We don't care about Milkosoft, Drop SMB/CIFS/etc..
$IPTABLES -A INPUT -p tcp -m multiport --dports 135,137,138,139,445,1433,1434 -j DROP
$IPTABLES -A INPUT -p udp -m multiport --dports 135,137,138,139,445,1433,1434 -j DROP
# Explicitly drop invalid incoming traffic
$IPTABLES -A INPUT -m state --state INVALID -j DROP
# Drop invalid outgoing traffic, too.
$IPTABLES -A OUTPUT -m state --state INVALID -j DROP
# If we would use NAT, INVALID packets would pass - BLOCK them anyways
$IPTABLES -A FORWARD -m state --state INVALID -j DROP
# PORT Scanners (stealth also)
$IPTABLES -A INPUT -m state --state NEW -p tcp --tcp-flags ALL ALL -j DROP
$IPTABLES -A INPUT -m state --state NEW -p tcp --tcp-flags ALL NONE -j DROP
# TODO: Some more anti-spoofing rules? For example:
# $IPTABLES -A INPUT -p tcp --tcp-flags ALL FIN,URG,PSH -j DROP
# $IPTABLES -A INPUT -p tcp --tcp-flags SYN,RST SYN,RST -j DROP
# $IPTABLES -A INPUT -p tcp --tcp-flags SYN,FIN SYN,FIN -j DROP
$IPTABLES -N SYN_FLOOD
$IPTABLES -A INPUT -p tcp --syn -j SYN_FLOOD
$IPTABLES -A SYN_FLOOD -m limit --limit 2/s --limit-burst 6 -j RETURN
$IPTABLES -A SYN_FLOOD -j DROP
# TODO: Block known-bad IPs (see http://www.dshield.org/top10.php).
# $IPTABLES -A INPUT -s INSERT-BAD-IP-HERE -j DROPLOG
# Drop any traffic from IANA-reserved IPs.
#------------------------------------------------------------------------------
$IPTABLES -A INPUT -s 0.0.0.0/7 -j DROP
$IPTABLES -A INPUT -s 2.0.0.0/8 -j DROP
$IPTABLES -A INPUT -s 5.0.0.0/8 -j DROP
$IPTABLES -A INPUT -s 7.0.0.0/8 -j DROP
$IPTABLES -A INPUT -s 10.0.0.0/8 -j DROP
$IPTABLES -A INPUT -s 23.0.0.0/8 -j DROP
$IPTABLES -A INPUT -s 27.0.0.0/8 -j DROP
$IPTABLES -A INPUT -s 31.0.0.0/8 -j DROP
$IPTABLES -A INPUT -s 36.0.0.0/7 -j DROP
$IPTABLES -A INPUT -s 39.0.0.0/8 -j DROP
$IPTABLES -A INPUT -s 42.0.0.0/8 -j DROP
$IPTABLES -A INPUT -s 49.0.0.0/8 -j DROP
$IPTABLES -A INPUT -s 50.0.0.0/8 -j DROP
$IPTABLES -A INPUT -s 77.0.0.0/8 -j DROP
$IPTABLES -A INPUT -s 78.0.0.0/7 -j DROP
$IPTABLES -A INPUT -s 92.0.0.0/6 -j DROP
$IPTABLES -A INPUT -s 96.0.0.0/4 -j DROP
$IPTABLES -A INPUT -s 112.0.0.0/5 -j DROP
$IPTABLES -A INPUT -s 120.0.0.0/8 -j DROP
$IPTABLES -A INPUT -s 169.254.0.0/16 -j DROP
$IPTABLES -A INPUT -s 172.16.0.0/12 -j DROP
$IPTABLES -A INPUT -s 173.0.0.0/8 -j DROP
$IPTABLES -A INPUT -s 174.0.0.0/7 -j DROP
$IPTABLES -A INPUT -s 176.0.0.0/5 -j DROP
$IPTABLES -A INPUT -s 184.0.0.0/6 -j DROP
$IPTABLES -A INPUT -s 192.0.2.0/24 -j DROP
$IPTABLES -A INPUT -s 197.0.0.0/8 -j DROP
$IPTABLES -A INPUT -s 198.18.0.0/15 -j DROP
$IPTABLES -A INPUT -s 223.0.0.0/8 -j DROP
$IPTABLES -A INPUT -s 224.0.0.0/3 -j DROP
# Selectively allow certain outbound connections, block the rest.
#------------------------------------------------------------------------------
# Allow outgoing DNS requests. Few things will work without this.
$IPTABLES -A OUTPUT -m state --state NEW -p udp --dport 53 -j ACCEPT
$IPTABLES -A OUTPUT -m state --state NEW -p tcp --dport 53 -j ACCEPT
# Allow outgoing HTTP requests. Unencrypted, use with care.
$IPTABLES -A OUTPUT -m state --state NEW -p tcp --dport 80 -j ACCEPT
# Allow outgoing HTTPS requests.
$IPTABLES -A OUTPUT -m state --state NEW -p tcp --dport 443 -j ACCEPT
# Allow outgoing SMTPS requests. Do NOT allow unencrypted SMTP!
# $IPTABLES -A OUTPUT -m state --state NEW -p tcp --dport 465 -j ACCEPT
# Allow outgoing "submission" (RFC 2476) requests.
$IPTABLES -A OUTPUT -m state --state NEW -p tcp --dport 587 -j ACCEPT
# Allow outgoing POP3S requests.
$IPTABLES -A OUTPUT -m state --state NEW -p tcp --dport 995 -j ACCEPT
# Allow outgoing SSH requests.
$IPTABLES -A OUTPUT -m state --state NEW -p tcp --dport 22 -j ACCEPT
# Allow outgoing FTP requests. Unencrypted, use with care.
$IPTABLES -A OUTPUT -m state --state NEW -p tcp --dport 21 -j ACCEPT
# Allow outgoing NNTP requests. Unencrypted, use with care.
# $IPTABLES -A OUTPUT -m state --state NEW -p tcp --dport 119 -j ACCEPT
# Allow outgoing NTP requests. Unencrypted, use with care.
# $IPTABLES -A OUTPUT -m state --state NEW -p udp --dport 123 -j ACCEPT
# Allow outgoing IRC requests. Unencrypted, use with care.
# Note: This usually needs the ip_conntrack_irc kernel module.
# $IPTABLES -A OUTPUT -m state --state NEW -p tcp --dport 6667 -j ACCEPT
# Allow outgoing requests to various proxies. Unencrypted, use with care.
# $IPTABLES -A OUTPUT -m state --state NEW -p tcp --dport 8080 -j ACCEPT
# $IPTABLES -A OUTPUT -m state --state NEW -p tcp --dport 8090 -j ACCEPT
# Allow outgoing DHCP requests. Unencrypted, use with care.
# TODO: This is completely untested, I have no idea whether it works!
# TODO: I think this can be tightened a bit more.
$IPTABLES -A OUTPUT -m state --state NEW -p udp --sport 67:68 --dport 67:68 -j ACCEPT
# Allow outgoing CVS requests. Unencrypted, use with care.
# $IPTABLES -A OUTPUT -m state --state NEW -p tcp --dport 2401 -j ACCEPT
# Allow outgoing MySQL requests. Unencrypted, use with care.
# $IPTABLES -A OUTPUT -m state --state NEW -p tcp --dport 3306 -j ACCEPT
# Allow outgoing SVN requests. Unencrypted, use with care.
# $IPTABLES -A OUTPUT -m state --state NEW -p tcp --dport 3690 -j ACCEPT
# Allow outgoing PLESK requests. Unencrypted, use with care.
# $IPTABLES -A OUTPUT -m state --state NEW -p tcp --dport 8443 -j ACCEPT
# Allow outgoing Tor (http://tor.eff.org) requests.
# Note: Do _not_ use unencrypted protocols over Tor (sniffing is possible)!
# $IPTABLES -A OUTPUT -m state --state NEW -p tcp --dport 9001 -j ACCEPT
# $IPTABLES -A OUTPUT -m state --state NEW -p tcp --dport 9002 -j ACCEPT
# $IPTABLES -A OUTPUT -m state --state NEW -p tcp --dport 9030 -j ACCEPT
# $IPTABLES -A OUTPUT -m state --state NEW -p tcp --dport 9031 -j ACCEPT
# $IPTABLES -A OUTPUT -m state --state NEW -p tcp --dport 9090 -j ACCEPT
# $IPTABLES -A OUTPUT -m state --state NEW -p tcp --dport 9091 -j ACCEPT
# Allow outgoing OpenVPN requests.
$IPTABLES -A OUTPUT -m state --state NEW -p udp --dport 1194 -j ACCEPT
# TODO: ICQ, MSN, GTalk, Skype, Yahoo, etc...
# Selectively allow certain inbound connections, block the rest.
#------------------------------------------------------------------------------
# Allow incoming DNS requests.
$IPTABLES -A INPUT -m state --state NEW -p udp --dport 53 -j ACCEPT
$IPTABLES -A INPUT -m state --state NEW -p tcp --dport 53 -j ACCEPT
# Allow incoming HTTP requests.
$IPTABLES -A INPUT -m state --state NEW -p tcp --dport 80 -j ACCEPT
# Allow incoming HTTPS requests.
$IPTABLES -A INPUT -m state --state NEW -p tcp --dport 443 -j ACCEPT
# Allow incoming POP3 requests.
$IPTABLES -A INPUT -m state --state NEW -p tcp --dport 110 -j ACCEPT
# Allow incoming IMAP4 requests.
$IPTABLES -A INPUT -m state --state NEW -p tcp --dport 143 -j ACCEPT
# Allow incoming POP3S requests.
$IPTABLES -A INPUT -m state --state NEW -p tcp --dport 995 -j ACCEPT
# Allow incoming SMTP requests.
$IPTABLES -A INPUT -m state --state NEW -p tcp --dport 25 -j ACCEPT
# Allow incoming SSH requests.
$IPTABLES -A INPUT -m state --state NEW -p tcp --dport 22 -j ACCEPT
# Allow incoming FTP requests.
$IPTABLES -A INPUT -m state --state NEW -p tcp --dport 21 -j ACCEPT
# Allow incoming NNTP requests.
# $IPTABLES -A INPUT -m state --state NEW -p tcp --dport 119 -j ACCEPT
# Allow incoming MySQL requests.
# $IPTABLES -A INPUT -m state --state NEW -p tcp --dport 3306 -j ACCEPT
# Allow incoming PLESK requests.
# $IPTABLES -A INPUT -m state --state NEW -p tcp --dport 8843 -j ACCEPT
# Allow incoming BitTorrent requests.
# TODO: Are these already handled by ACCEPTing established/related traffic?
# $IPTABLES -A INPUT -m state --state NEW -p tcp --dport 6881 -j ACCEPT
# $IPTABLES -A INPUT -m state --state NEW -p udp --dport 6881 -j ACCEPT
# Allow incoming nc requests.
# $IPTABLES -A INPUT -m state --state NEW -p tcp --dport 2030 -j ACCEPT
# $IPTABLES -A INPUT -m state --state NEW -p udp --dport 2030 -j ACCEPT
# Explicitly log and reject everything else.
#------------------------------------------------------------------------------
# Use REJECT instead of REJECTLOG if you don't need/want logging.
$IPTABLES -A INPUT -j REJECTLOG
$IPTABLES -A OUTPUT -j REJECTLOG
$IPTABLES -A FORWARD -j REJECTLOG
#------------------------------------------------------------------------------
# Testing the firewall.
#------------------------------------------------------------------------------
# You should check/test that the firewall really works, using
# iptables -vnL, nmap, ping, telnet, ...
# Exit gracefully.
#------------------------------------------------------------------------------
exit 0
- chmod +x "bash-name"
-
#------------------------------------------------------------------------------
#
# File: SIG-antiDDoS.sh
#
# Compiler: Ruslan Abuzant
# PS> Collected From Lots Of Sources
# PS> Credits: Real Authors (no idea)
#
# URL: http://www.liteforex.org/
#
# License: GNU GPL (version 2, or any later version).
#
# Configuration.
#------------------------------------------------------------------------------
# For debugging use iptables -v.
IPTABLES="/sbin/iptables"
IP6TABLES="/sbin/ip6tables"
MODPROBE="/sbin/modprobe"
RMMOD="/sbin/rmmod"
ARP="/usr/sbin/arp"
# Logging options.
#------------------------------------------------------------------------------
LOG="LOG --log-level debug --log-tcp-sequence --log-tcp-options"
LOG="$LOG --log-ip-options"
# Defaults for rate limiting
#------------------------------------------------------------------------------
RLIMIT="-m limit --limit 3/s --limit-burst 8"
# Unprivileged ports.
#------------------------------------------------------------------------------
PHIGH="1024:65535"
PSSH="1000:1023"
# Load required kernel modules
#------------------------------------------------------------------------------
$MODPROBE ip_conntrack_ftp
$MODPROBE ip_conntrack_irc
# Mitigate ARP spoofing/poisoning and similar attacks.
#------------------------------------------------------------------------------
# Hardcode static ARP cache entries here
# $ARP -s IP-ADDRESS MAC-ADDRESS
# Kernel configuration.
#------------------------------------------------------------------------------
# Disable IP forwarding.
# On => Off = (reset)
echo 1 > /proc/sys/net/ipv4/ip_forward
echo 0 > /proc/sys/net/ipv4/ip_forward
# Enable IP spoofing protection
for i in /proc/sys/net/ipv4/conf/*/rp_filter; do echo 1 > $i; done
# Protect against SYN flood attacks
echo 1 > /proc/sys/net/ipv4/tcp_syncookies
# Ignore all incoming ICMP echo requests
echo 0 > /proc/sys/net/ipv4/icmp_echo_ignore_all
# Ignore ICMP echo requests to broadcast
echo 1 > /proc/sys/net/ipv4/icmp_echo_ignore_broadcasts
# Log packets with impossible addresses.
for i in /proc/sys/net/ipv4/conf/*/log_martians; do echo 1 > $i; done
# Don't log invalid responses to broadcast
echo 1 > /proc/sys/net/ipv4/icmp_ignore_bogus_error_responses
# Don't accept or send ICMP redirects.
for i in /proc/sys/net/ipv4/conf/*/accept_redirects; do echo 0 > $i; done
for i in /proc/sys/net/ipv4/conf/*/send_redirects; do echo 0 > $i; done
# Don't accept source routed packets.
for i in /proc/sys/net/ipv4/conf/*/accept_source_route; do echo 0 > $i; done
# Disable multicast routing
for i in /proc/sys/net/ipv4/conf/*/mc_forwarding; do echo 0 > $i; done
# Disable proxy_arp.
for i in /proc/sys/net/ipv4/conf/*/proxy_arp; do echo 0 > $i; done
# Enable secure redirects, i.e. only accept ICMP redirects for gateways
# Helps against MITM attacks.
for i in /proc/sys/net/ipv4/conf/*/secure_redirects; do echo 1 > $i; done
# Disable bootp_relay
for i in /proc/sys/net/ipv4/conf/*/bootp_relay; do echo 0 > $i; done
# Default policies.
#------------------------------------------------------------------------------
# Drop everything by default.
$IPTABLES -P INPUT DROP
$IPTABLES -P FORWARD DROP
$IPTABLES -P OUTPUT DROP
# Set the nat/mangle/raw tables' chains to ACCEPT
$IPTABLES -t nat -P PREROUTING ACCEPT
$IPTABLES -t nat -P OUTPUT ACCEPT
$IPTABLES -t nat -P POSTROUTING ACCEPT
$IPTABLES -t mangle -P PREROUTING ACCEPT
$IPTABLES -t mangle -P INPUT ACCEPT
$IPTABLES -t mangle -P FORWARD ACCEPT
$IPTABLES -t mangle -P OUTPUT ACCEPT
$IPTABLES -t mangle -P POSTROUTING ACCEPT
# Cleanup.
#------------------------------------------------------------------------------
# Delete all
$IPTABLES -F
$IPTABLES -t nat -F
$IPTABLES -t mangle -F
# Delete all
$IPTABLES -X
$IPTABLES -t nat -X
$IPTABLES -t mangle -X
# Zero all packets and counters.
$IPTABLES -Z
$IPTABLES -t nat -Z
$IPTABLES -t mangle -Z
# Completely disable IPv6.
#------------------------------------------------------------------------------
# Block all IPv6 traffic
# If the ip6tables command is available, try to block all IPv6 traffic.
if test -x $IP6TABLES; then
# Set the default policies
# drop everything
$IP6TABLES -P INPUT DROP 2>/dev/null
$IP6TABLES -P FORWARD DROP 2>/dev/null
$IP6TABLES -P OUTPUT DROP 2>/dev/null
# The mangle table can pass everything
$IP6TABLES -t mangle -P PREROUTING ACCEPT 2>/dev/null
$IP6TABLES -t mangle -P INPUT ACCEPT 2>/dev/null
$IP6TABLES -t mangle -P FORWARD ACCEPT 2>/dev/null
$IP6TABLES -t mangle -P OUTPUT ACCEPT 2>/dev/null
$IP6TABLES -t mangle -P POSTROUTING ACCEPT 2>/dev/null
# Delete all rules.
$IP6TABLES -F 2>/dev/null
$IP6TABLES -t mangle -F 2>/dev/null
# Delete all chains.
$IP6TABLES -X 2>/dev/null
$IP6TABLES -t mangle -X 2>/dev/null
# Zero all packets and counters.
$IP6TABLES -Z 2>/dev/null
$IP6TABLES -t mangle -Z 2>/dev/null
fi
# Custom user-defined chains.
#------------------------------------------------------------------------------
# LOG packets, then ACCEPT.
$IPTABLES -N ACCEPTLOG
$IPTABLES -A ACCEPTLOG -j $LOG $RLIMIT --log-prefix "ACCEPT "
$IPTABLES -A ACCEPTLOG -j ACCEPT
# LOG packets, then DROP.
$IPTABLES -N DROPLOG
$IPTABLES -A DROPLOG -j $LOG $RLIMIT --log-prefix "DROP "
$IPTABLES -A DROPLOG -j DROP
# LOG packets, then REJECT.
# TCP packets are rejected with a TCP reset.
$IPTABLES -N REJECTLOG
$IPTABLES -A REJECTLOG -j $LOG $RLIMIT --log-prefix "REJECT "
$IPTABLES -A REJECTLOG -p tcp -j REJECT --reject-with tcp-reset
$IPTABLES -A REJECTLOG -j REJECT
# Only allows RELATED ICMP types
# (destination-unreachable, time-exceeded, and parameter-problem).
# TODO: Rate-limit this traffic?
# TODO: Allow fragmentation-needed?
# TODO: Test.
$IPTABLES -N RELATED_ICMP
$IPTABLES -A RELATED_ICMP -p icmp --icmp-type destination-unreachable -j ACCEPT
$IPTABLES -A RELATED_ICMP -p icmp --icmp-type time-exceeded -j ACCEPT
$IPTABLES -A RELATED_ICMP -p icmp --icmp-type parameter-problem -j ACCEPT
$IPTABLES -A RELATED_ICMP -j DROPLOG
# Make It Even Harder To Multi-PING
$IPTABLES -A INPUT -p icmp -m limit --limit 1/s --limit-burst 2 -j ACCEPT
$IPTABLES -A INPUT -p icmp -m limit --limit 1/s --limit-burst 2 -j LOG --log-prefix PING-DROP:
$IPTABLES -A INPUT -p icmp -j DROP
$IPTABLES -A OUTPUT -p icmp -j ACCEPT
# Only allow the minimally required/recommended parts of ICMP. Block the rest.
#------------------------------------------------------------------------------
# TODO: This section needs a lot of testing!
# First, drop all fragmented ICMP packets (almost always malicious).
$IPTABLES -A INPUT -p icmp --fragment -j DROPLOG
$IPTABLES -A OUTPUT -p icmp --fragment -j DROPLOG
$IPTABLES -A FORWARD -p icmp --fragment -j DROPLOG
# Allow all ESTABLISHED ICMP traffic.
$IPTABLES -A INPUT -p icmp -m state --state ESTABLISHED -j ACCEPT $RLIMIT
$IPTABLES -A OUTPUT -p icmp -m state --state ESTABLISHED -j ACCEPT $RLIMIT
# Allow some parts of the RELATED ICMP traffic, block the rest.
$IPTABLES -A INPUT -p icmp -m state --state RELATED -j RELATED_ICMP $RLIMIT
$IPTABLES -A OUTPUT -p icmp -m state --state RELATED -j RELATED_ICMP $RLIMIT
# Allow incoming ICMP echo requests (ping), but only rate-limited.
$IPTABLES -A INPUT -p icmp --icmp-type echo-request -j ACCEPT $RLIMIT
# Allow outgoing ICMP echo requests (ping), but only rate-limited.
$IPTABLES -A OUTPUT -p icmp --icmp-type echo-request -j ACCEPT $RLIMIT
# Drop any other ICMP traffic.
$IPTABLES -A INPUT -p icmp -j DROPLOG
$IPTABLES -A OUTPUT -p icmp -j DROPLOG
$IPTABLES -A FORWARD -p icmp -j DROPLOG
# Selectively allow certain special types of traffic.
#------------------------------------------------------------------------------
# Allow loopback interface to do anything.
$IPTABLES -A INPUT -i lo -j ACCEPT
$IPTABLES -A OUTPUT -o lo -j ACCEPT
# Allow incoming connections related to existing allowed connections.
$IPTABLES -A INPUT -m state --state ESTABLISHED,RELATED -j ACCEPT
# Allow outgoing connections EXCEPT invalid
$IPTABLES -A OUTPUT -m state --state NEW,ESTABLISHED,RELATED -j ACCEPT
# Miscellaneous.
#------------------------------------------------------------------------------
# We don't care about Milkosoft, Drop SMB/CIFS/etc..
$IPTABLES -A INPUT -p tcp -m multiport --dports 135,137,138,139,445,1433,1434 -j DROP
$IPTABLES -A INPUT -p udp -m multiport --dports 135,137,138,139,445,1433,1434 -j DROP
# Explicitly drop invalid incoming traffic
$IPTABLES -A INPUT -m state --state INVALID -j DROP
# Drop invalid outgoing traffic, too.
$IPTABLES -A OUTPUT -m state --state INVALID -j DROP
# If we would use NAT, INVALID packets would pass - BLOCK them anyways
$IPTABLES -A FORWARD -m state --state INVALID -j DROP
# PORT Scanners (stealth also)
$IPTABLES -A INPUT -m state --state NEW -p tcp --tcp-flags ALL ALL -j DROP
$IPTABLES -A INPUT -m state --state NEW -p tcp --tcp-flags ALL NONE -j DROP
# TODO: Some more anti-spoofing rules? For example:
# $IPTABLES -A INPUT -p tcp --tcp-flags ALL FIN,URG,PSH -j DROP
# $IPTABLES -A INPUT -p tcp --tcp-flags SYN,RST SYN,RST -j DROP
# $IPTABLES -A INPUT -p tcp --tcp-flags SYN,FIN SYN,FIN -j DROP
$IPTABLES -N SYN_FLOOD
$IPTABLES -A INPUT -p tcp --syn -j SYN_FLOOD
$IPTABLES -A SYN_FLOOD -m limit --limit 2/s --limit-burst 6 -j RETURN
$IPTABLES -A SYN_FLOOD -j DROP
# TODO: Block known-bad IPs (see http://www.dshield.org/top10.php).
# $IPTABLES -A INPUT -s INSERT-BAD-IP-HERE -j DROPLOG
# Drop any traffic from IANA-reserved IPs.
#------------------------------------------------------------------------------
$IPTABLES -A INPUT -s 0.0.0.0/7 -j DROP
$IPTABLES -A INPUT -s 2.0.0.0/8 -j DROP
$IPTABLES -A INPUT -s 5.0.0.0/8 -j DROP
$IPTABLES -A INPUT -s 7.0.0.0/8 -j DROP
$IPTABLES -A INPUT -s 10.0.0.0/8 -j DROP
$IPTABLES -A INPUT -s 23.0.0.0/8 -j DROP
$IPTABLES -A INPUT -s 27.0.0.0/8 -j DROP
$IPTABLES -A INPUT -s 31.0.0.0/8 -j DROP
$IPTABLES -A INPUT -s 36.0.0.0/7 -j DROP
$IPTABLES -A INPUT -s 39.0.0.0/8 -j DROP
$IPTABLES -A INPUT -s 42.0.0.0/8 -j DROP
$IPTABLES -A INPUT -s 49.0.0.0/8 -j DROP
$IPTABLES -A INPUT -s 50.0.0.0/8 -j DROP
$IPTABLES -A INPUT -s 77.0.0.0/8 -j DROP
$IPTABLES -A INPUT -s 78.0.0.0/7 -j DROP
$IPTABLES -A INPUT -s 92.0.0.0/6 -j DROP
$IPTABLES -A INPUT -s 96.0.0.0/4 -j DROP
$IPTABLES -A INPUT -s 112.0.0.0/5 -j DROP
$IPTABLES -A INPUT -s 120.0.0.0/8 -j DROP
$IPTABLES -A INPUT -s 169.254.0.0/16 -j DROP
$IPTABLES -A INPUT -s 172.16.0.0/12 -j DROP
$IPTABLES -A INPUT -s 173.0.0.0/8 -j DROP
$IPTABLES -A INPUT -s 174.0.0.0/7 -j DROP
$IPTABLES -A INPUT -s 176.0.0.0/5 -j DROP
$IPTABLES -A INPUT -s 184.0.0.0/6 -j DROP
$IPTABLES -A INPUT -s 192.0.2.0/24 -j DROP
$IPTABLES -A INPUT -s 197.0.0.0/8 -j DROP
$IPTABLES -A INPUT -s 198.18.0.0/15 -j DROP
$IPTABLES -A INPUT -s 223.0.0.0/8 -j DROP
$IPTABLES -A INPUT -s 224.0.0.0/3 -j DROP
# Selectively allow certain outbound connections, block the rest.
#------------------------------------------------------------------------------
# Allow outgoing DNS requests. Few things will work without this.
$IPTABLES -A OUTPUT -m state --state NEW -p udp --dport 53 -j ACCEPT
$IPTABLES -A OUTPUT -m state --state NEW -p tcp --dport 53 -j ACCEPT
# Allow outgoing HTTP requests. Unencrypted, use with care.
$IPTABLES -A OUTPUT -m state --state NEW -p tcp --dport 80 -j ACCEPT
# Allow outgoing HTTPS requests.
$IPTABLES -A OUTPUT -m state --state NEW -p tcp --dport 443 -j ACCEPT
# Allow outgoing SMTPS requests. Do NOT allow unencrypted SMTP!
# $IPTABLES -A OUTPUT -m state --state NEW -p tcp --dport 465 -j ACCEPT
# Allow outgoing "submission" (RFC 2476) requests.
$IPTABLES -A OUTPUT -m state --state NEW -p tcp --dport 587 -j ACCEPT
# Allow outgoing POP3S requests.
$IPTABLES -A OUTPUT -m state --state NEW -p tcp --dport 995 -j ACCEPT
# Allow outgoing SSH requests.
$IPTABLES -A OUTPUT -m state --state NEW -p tcp --dport 22 -j ACCEPT
# Allow outgoing FTP requests. Unencrypted, use with care.
$IPTABLES -A OUTPUT -m state --state NEW -p tcp --dport 21 -j ACCEPT
# Allow outgoing NNTP requests. Unencrypted, use with care.
# $IPTABLES -A OUTPUT -m state --state NEW -p tcp --dport 119 -j ACCEPT
# Allow outgoing NTP requests. Unencrypted, use with care.
# $IPTABLES -A OUTPUT -m state --state NEW -p udp --dport 123 -j ACCEPT
# Allow outgoing IRC requests. Unencrypted, use with care.
# Note: This usually needs the ip_conntrack_irc kernel module.
# $IPTABLES -A OUTPUT -m state --state NEW -p tcp --dport 6667 -j ACCEPT
# Allow outgoing requests to various proxies. Unencrypted, use with care.
# $IPTABLES -A OUTPUT -m state --state NEW -p tcp --dport 8080 -j ACCEPT
# $IPTABLES -A OUTPUT -m state --state NEW -p tcp --dport 8090 -j ACCEPT
# Allow outgoing DHCP requests. Unencrypted, use with care.
# TODO: This is completely untested, I have no idea whether it works!
# TODO: I think this can be tightened a bit more.
$IPTABLES -A OUTPUT -m state --state NEW -p udp --sport 67:68 --dport 67:68 -j ACCEPT
# Allow outgoing CVS requests. Unencrypted, use with care.
# $IPTABLES -A OUTPUT -m state --state NEW -p tcp --dport 2401 -j ACCEPT
# Allow outgoing MySQL requests. Unencrypted, use with care.
# $IPTABLES -A OUTPUT -m state --state NEW -p tcp --dport 3306 -j ACCEPT
# Allow outgoing SVN requests. Unencrypted, use with care.
# $IPTABLES -A OUTPUT -m state --state NEW -p tcp --dport 3690 -j ACCEPT
# Allow outgoing PLESK requests. Unencrypted, use with care.
# $IPTABLES -A OUTPUT -m state --state NEW -p tcp --dport 8443 -j ACCEPT
# Allow outgoing Tor (http://tor.eff.org) requests.
# Note: Do _not_ use unencrypted protocols over Tor (sniffing is possible)!
# $IPTABLES -A OUTPUT -m state --state NEW -p tcp --dport 9001 -j ACCEPT
# $IPTABLES -A OUTPUT -m state --state NEW -p tcp --dport 9002 -j ACCEPT
# $IPTABLES -A OUTPUT -m state --state NEW -p tcp --dport 9030 -j ACCEPT
# $IPTABLES -A OUTPUT -m state --state NEW -p tcp --dport 9031 -j ACCEPT
# $IPTABLES -A OUTPUT -m state --state NEW -p tcp --dport 9090 -j ACCEPT
# $IPTABLES -A OUTPUT -m state --state NEW -p tcp --dport 9091 -j ACCEPT
# Allow outgoing OpenVPN requests.
$IPTABLES -A OUTPUT -m state --state NEW -p udp --dport 1194 -j ACCEPT
# TODO: ICQ, MSN, GTalk, Skype, Yahoo, etc...
# Selectively allow certain inbound connections, block the rest.
#------------------------------------------------------------------------------
# Allow incoming DNS requests.
$IPTABLES -A INPUT -m state --state NEW -p udp --dport 53 -j ACCEPT
$IPTABLES -A INPUT -m state --state NEW -p tcp --dport 53 -j ACCEPT
# Allow incoming HTTP requests.
$IPTABLES -A INPUT -m state --state NEW -p tcp --dport 80 -j ACCEPT
# Allow incoming HTTPS requests.
$IPTABLES -A INPUT -m state --state NEW -p tcp --dport 443 -j ACCEPT
# Allow incoming POP3 requests.
$IPTABLES -A INPUT -m state --state NEW -p tcp --dport 110 -j ACCEPT
# Allow incoming IMAP4 requests.
$IPTABLES -A INPUT -m state --state NEW -p tcp --dport 143 -j ACCEPT
# Allow incoming POP3S requests.
$IPTABLES -A INPUT -m state --state NEW -p tcp --dport 995 -j ACCEPT
# Allow incoming SMTP requests.
$IPTABLES -A INPUT -m state --state NEW -p tcp --dport 25 -j ACCEPT
# Allow incoming SSH requests.
$IPTABLES -A INPUT -m state --state NEW -p tcp --dport 22 -j ACCEPT
# Allow incoming FTP requests.
$IPTABLES -A INPUT -m state --state NEW -p tcp --dport 21 -j ACCEPT
# Allow incoming NNTP requests.
# $IPTABLES -A INPUT -m state --state NEW -p tcp --dport 119 -j ACCEPT
# Allow incoming MySQL requests.
# $IPTABLES -A INPUT -m state --state NEW -p tcp --dport 3306 -j ACCEPT
# Allow incoming PLESK requests.
# $IPTABLES -A INPUT -m state --state NEW -p tcp --dport 8843 -j ACCEPT
# Allow incoming BitTorrent requests.
# TODO: Are these already handled by ACCEPTing established/related traffic?
# $IPTABLES -A INPUT -m state --state NEW -p tcp --dport 6881 -j ACCEPT
# $IPTABLES -A INPUT -m state --state NEW -p udp --dport 6881 -j ACCEPT
# Allow incoming nc requests.
# $IPTABLES -A INPUT -m state --state NEW -p tcp --dport 2030 -j ACCEPT
# $IPTABLES -A INPUT -m state --state NEW -p udp --dport 2030 -j ACCEPT
# Explicitly log and reject everything else.
#------------------------------------------------------------------------------
# Use REJECT instead of REJECTLOG if you don't need/want logging.
$IPTABLES -A INPUT -j REJECTLOG
$IPTABLES -A OUTPUT -j REJECTLOG
$IPTABLES -A FORWARD -j REJECTLOG
#------------------------------------------------------------------------------
# Testing the firewall.
#------------------------------------------------------------------------------
# You should check/test that the firewall really works, using
# iptables -vnL, nmap, ping, telnet, ...
# Exit gracefully.
#------------------------------------------------------------------------------
exit 0
- chmod +x "bash-name"
-
9/07/2010
Transparent Squid On FreeBSD
This section shows you howto setup transparent proxy with squid, redirecting http traffic to squid port. The howto is for FreeBSD setups that uses OpenBSD packet filter - pf, or ipfw firewall.
Step 1
--------
Install squid from ports. If you use pf firewall you will need to compile Squid with support for pf.
cd /usr/ports/www/squid
make install
If you use pf firewall you must compile squid with transparent pf support. (there are also other options like support for diskd)
cd /usr/ports/www/squid/work/squid-2.5.STABLE12
./configure --bindir=/usr/local/sbin --sysconfdir=/usr/local/etc/squid --datadir=/usr/local/etc/squid --libexecdir=/usr/local/libexec/squid --localstatedir=/usr/local/squid --enable-removal-policies=lru,heap --enable-auth=basic,ntlm,digest --enable-basic-auth-helpers=NCSA,PAM,MSNT,SMB,winbind,YP --enable-digest-auth-helpers=password --enable-external-acl-helpers=ip_user,unix_group,wbinfo_group,winbind_gr oup --enable-ntlm-auth-helpers=SMB,winbind --enable-storeio=ufs,diskd,null --enable-underscores --enable-err-languages=English --enable-default-err-language=Romanian --with-large-files --enable-large-cache-files --enable-delay-pools --enable-ipf-transparent --disable-ident-lookups --enable-snmp --enable-removal-policies --prefix=/usr/local i386-portbld-freebsd6.1
--enable-pf-transparent
make install
Step 2
--------
a) If you are using pf firewall:
You shoud add the following rules in order to redirect http traffic to squid (assuming squid is running on port 8080):
# --------- pf.conf ----------
int_if="fxp0"
ext_if="fxp1"
rdr on $int_if inet proto tcp from any to any port www -> 127.0.0.1 port 8080
pass in on $int_if inet proto tcp from any to 127.0.0.1 port 8080 keep state
pass out on $ext_if inet proto tcp from any to any port www keep state
# ------- end pf.conf -------
Also we must allow squid to access pf device.
chgrp _squid /dev/pf
chmod g+rw /dev/pf
b) If you are using ipfw firewall
Add your redirect rule in your ipfw config file:
int_if="fxp0"
ipfw add 1000 fwd 127.0.0.1,8080 tcp from any to any 80 in recv $int_if
In both setups, with pf or ipfw firewall if you are using pppoe servers or other setups in which you use ng netgraph or tun interfaces, the redirect rule must be on that particular ng interface.
When using ipfw you can redirect http traffic to ng*. With pf using ng* will not work.
Your squid.conf should like like that:
(please modify the path where your stored squid cache, the size of cache and also the allowed ip range for your squid daemon. Don't forget do do a 'squid -z' if you did not, at install time (for creating cache directories).
#my settings
http_port 8080
icp_port 0
hierarchy_stoplist cgi-bin ?
acl QUERY urlpath_regex cgi-bin \?
no_cache deny QUERY
cache_mem 128 MB
maximum_object_size 80000 KB
ipcache_size 1024
ipcache_low 90
ipcache_high 95
cache_dir diskd /mnt/squid 28000 32 512 Q1=72 Q2=64
log_fqdn off
logfile_rotate 10
dns_nameservers 10.0.0.1
auth_param basic children 5
auth_param basic realm Squid proxy-caching web server
auth_param basic credentialsttl 2 hours
refresh_pattern ^ftp: 1440 20% 10080
refresh_pattern ^gopher: 1440 0% 1440
refresh_pattern . 0 20% 4320
#next, remove
acl localnet src 10.0.0.0/255.255.0.0
acl localhost src 127.0.0.1/255.255.255.255
acl to_localhost dst 127.0.0.0/8
acl SSL_ports port 443 563
acl Safe_ports port 80 21 443 563 210 1025-65535 280 488 591 777
acl CONNECT method CONNECT
acl all src 0.0.0.0/0.0.0.0
http_access deny !Safe_ports
http_access allow localnet
http_reply_access allow all
visible_hostname localhost
httpd_accel_host virtual
httpd_accel_port 80
httpd_accel_with_proxy on
httpd_accel_uses_host_header on
coredump_dir /usr/local/squid/cache
HOWTO: Limit Ip connections
Installing mod_limitipconn.c
http://dominia.org/djao/
Intro
============
This is the distribution page for the Apache module mod_limitipconn.c, which
allows web server administrators to limit the number of simultaneous downloads
permitted from a single IP address.
Why did I write this module? Well, I run an mp3 server which since its
inception was being constantly hosed by people who were trying to download
dozens of files at once. For months I scoured the Internet looking for a code
snippet that would solve this problem. The closest thing I found was this patch
against an old version of Apache, and it didn't run properly on my Linux box
(that was back then; nowadays, the patch doesn't even apply cleanly to the
Apache source tree).
Finally I gave up and decided to write something to do the job myself, and
here's the result.
=================
Log into ssh
cd /usr/src
wget http://dominia.org/djao/limit/mod_li...nn-0.04.tar.gz
tar xzvf mod_limitipconn-0.04.tar.gz
cd mod_limitipconn-0.04
pico Makefile
find the line that reads APXS=apxs[/b]
change that to
APXS=/usr/local/apache/bin/apxs
press cntrl O to save
then cntrl X
// if your locations to apxs is different
locate apxs and copy the path
then paste that in
//
make
make install
service httpd restart
pico -w /etc/httpd/conf/httpd.conf
locate ExtendedStatus
Make sure ExtendedStatus is on and without the comment at the start
and add this line to every virtual directory you want to limit
or add it once to the main directory to limit all
MaxConnPerIP 3
# exempting images from the connection limit is often a good
# idea if your web page has lots of inline images, since these
# pages often generate a flurry of concurrent image requests
NoIPLimit image/*
MaxConnPerIP 1
# In this case, all MIME types other than audio/mpeg and video*
# are exempt from the limit check
OnlyIPLimit audio/mpeg video
press cntrl O to save
then cntrl X
then service httpd restart
Install Lighttpd with PHP5 and MySQL on CentOS 5.4
[1] Install MySQL 5.0
- Use command line:
yum install mysql mysql-server
- Start MySQL with OS
chkconfig --levels 235 mysqld on
/etc/init.d/mysqld start
- Take password for root on MySQL
mysqladmin -u root password yourrootsqlpassword
mysqladmin -h server1.example.com -u root password yourrootsqlpassword
[2] Install Lighttpd
1. Download packet rpmforge-release if system your is x86_64 and install
wget http://packages.sw.be/rpmforge-release/rpmforge-release-0.3.6-1.el5.rf.x86_64.rpm
rpm -Uvh rpmforge-release-0.3.6-1.el5.rf.x86_64.rpm
- If system your is i386 and install
wget http://packages.sw.be/rpmforge-release/rpmforge-release-0.3.6-1.el5.rf.i386.rpm
rpm -Uvh rpmforge-release-0.3.6-1.el5.rf.i386.rpm
2. Install Lighttpd
yum install lighttpd
3. Start Lighttpd with OS
chkconfig --levels 235 lighttpd on
/etc/init.d/lighttpd start
[3] Install PHP5
1. Install Lighttpd-fastcgi and php-cli
yum install lighttpd-fastcgi php-cli
2. Configuring Lighttpd And PHP5
- Open /etc/php.ini add "cgi.fix_pathinfo = 1"
[...]
cgi.fix_pathinfo = 1
3. Open /etc/lighttpd/lighttpd.conf and uncomment "mod_fastcgi"
[...]
server.modules = (
# "mod_rewrite",
# "mod_redirect",
# "mod_alias",
"mod_access",
# "mod_cml",
# "mod_trigger_b4_dl",
# "mod_auth",
# "mod_status",
# "mod_setenv",
"mod_fastcgi",
# "mod_proxy",
# "mod_simple_vhost",
# "mod_evhost",
# "mod_userdir",
# "mod_cgi",
# "mod_compress",
# "mod_ssi",
# "mod_usertrack",
# "mod_expire",
# "mod_secdownload",
# "mod_rrdtool",
"mod_accesslog" )
[...]
4. In file lighttpd.conf, after uncomment "fastcgi.server"
[...]
#### fastcgi module
## read fastcgi.txt for more info
## for PHP don't forget to set cgi.fix_pathinfo = 1 in the php.ini
fastcgi.server = ( ".php" =>
( "localhost" =>
(
"socket" => "/tmp/php-fastcgi.socket",
"bin-path" => "/usr/bin/php-cgi"
)
)
)
[...]
5. Restart service Lighttpd
/etc/init.d/lighttpd restart
6. Take file /srv/www/lighttpd/info.php
phpinfo();
?>
7. Open brows add address http://ip_your/info.php
[4] Configuring PHP5 support MySQL
1. Install php-mysql
yum install php-mysql php-gd php-imap php-ldap php-odbc php-pear php-xml php-xmlrpc
2. Restart Lighttpd
/etc/init.d/lighttpd restart
9/01/2010
Build LDAP Server
[1] Install and Configure OpenLDAP. Replace my domain name section [linuxbasiccommand.blogspot.com] with your domain name.
[root@ns ~]# yum -y install openldap*
# create password
[root@ns ~]# slappasswd -s password -h {MD5}
# (1) remember it
{MD5}*********************
[root@ns ~]# vi /etc/openldap/slapd.conf
# line 85: specify domain name
suffix "dc=server-linux,dc=info"
# line 86: specify domain name
rootdn "cn=Manager,dc=server-linux,dc=info"
# line 91: add password that is set in (1)
rootpw {MD5}************************
# add these lines at the bottom
access to attrs=userPassword
by self write
by dn="cn=Manager,dc=server-linux,dc=info" write
by anonymous auth
by * none
access to *
by dn="cn=Manager,dc=server-linux,dc=info" write
by self write
by * read
[root@ns ~]# vi /etc/openldap/ldap.conf
# line 15: specify domain name
URI ldap://127.0.0.1/
BASE dc=server-linux,dc=info
TLS_CACERTDIR /etc/openldap/cacerts
[root@ns ~]# vi /etc/ldap.conf
# line 20: specify domain name
base dc=server-linux,dc=info
[root@ns ~]# cp /etc/openldap/DB_CONFIG.example /var/lib/ldap/DB_CONFIG
[root@ns ~]# /etc/rc.d/init.d/ldap start
Checking configuration files for slapd: /etc/openldap/slapd.conf: line 114: rootdn is always granted unlimited privileges.
/etc/openldap/slapd.conf: line 118: rootdn is always granted unlimited privileges.
config file testing succeeded[ OK ]
Starting slapd:[ OK ]
[root@ns ~]# chkconfig ldap on
[2] Add initial information
[root@ns ~]# cd /usr/share/openldap/migration
[root@ns migration]# vi migrate_common.ph
# line 71: specify domain name
$DEFAULT_MAIL_DOMAIN = "server-linux.info";
# line 74: specify domain name
$DEFAULT_BASE = "dc=server-linux,dc=info";
[root@ns migration]# ./migrate_base.pl > base.ldif
[root@ns migration]# vi base.ldif
# edit only sections that are needed for your environment ( The follows is minimum requirement example )
dn: dc=server-linux,dc=info
dc: server-linux
objectClass: top
objectClass: domain
dn: ou=People,dc=server-linux,dc=info
ou: People
objectClass: top
objectClass: organizationalUnit
dn: ou=Group,dc=server-linux,dc=info
ou: Group
objectClass: top
objectClass: organizationalUnit
[root@ns migration]# ldapadd -x -W -D "cn=Manager,dc=server-linux,dc=info" -f base.ldif
Enter LDAP Password:# passowrd set in (1)
adding new entry "dc=server-linux,dc=info"
adding new entry "ou=People,dc=server-linux,dc=info"
adding new entry "ou=Group,dc=server-linux,dc=info"
[3] Add Existing User and Group to LDAP Server
[root@ns migration]# grep ":5[0-9][0-9]" /etc/passwd > passwd
[root@ns migration]# grep ":5[0-9][0-9]" /etc/group > group
[root@ns migration]# ./migrate_passwd.pl passwd > passwd.ldif
[root@ns migration]# ./migrate_group.pl group > group.ldif
# add user and group to LDAP Server
[root@ns migration]# ldapadd -x -W -D "cn=Manager,dc=server-linux,dc=info" -f passwd.ldif
Enter LDAP Password:
adding new entry "uid=cent,ou=People,dc=server-linux,dc=info"
[root@ns migration]# ldapadd -x -W -D "cn=Manager,dc=server-linux,dc=info" -f group.ldif
Enter LDAP Password:
adding new entry "cn=cent,ou=Group,dc=server-linux,dc=info"
[4] If you'd like to delete User or Group that is added in LDAP Server, Do as below.
[root@ns ~]# ldapdelete -x -W -D 'cn=Manager,dc=server-linux,dc=info' "uid=cent,ou=people,dc=server-linux,dc=info"
Enter LDAP Password:
[root@ns ~]# ldapdelete -x -W -D 'cn=Manager,dc=server-linux,dc=info' "cn=cent,ou=group,dc=server-linux,dc=info"
Enter LDAP Password:
[5] After building LDAP Server, Configure on clients in order to share users' accounts
[root@www ~]# yum -y install openldap-clients
[root@www ~]# setup# run config tool
(1) Select 'Authentication Configuration' and go next
(2) Check boxes like following example and go next
(3) Specify IP address and Domain name of LDAP Server like following example
[root@www ~]# shutdown -r now
www.server-linux.info login:cent# the user on LDAP server
Password:
Last login: Mon Sep 10 22:10:17 on xvc0
[cent@www ~]$# could login normally
Subscribe to:
Posts (Atom)