This is an example to build Web Server. Install Apache2 for it. In addition to do it, it's also neccessary to configure router so that TCP and UDP packets to 80 and 443 can pass through.
1.Install Apache2
root@www05:~# aptitude -y install apache2 2.Configure Apache2 to use CGI in any directory
root@www05:~# vi /etc/apache2/conf.d/security
In this tutorial I use the hostname server1.example.com with the IP address 192.168.0.100. These settings might differ for you, so you have to replace them where appropriate.
I'm running all the steps in this tutorial with root privileges, so make sure you're logged in as root:
sudo su
2 Installing MySQL 5
First we install MySQL 5 like this:
aptitude install mysql-server mysql-client
You will be asked to provide a password for the MySQL root user - this password is valid for the user root@localhost as well as root@server1.example.com, so we don't have to specify a MySQL root password manually later on: New password for the MySQL "root" user:<-- yourrootsqlpassword Repeat password for the MySQL "root" user:<-- yourrootsqlpassword
3 Installing Apache2
Apache2 is available as an Ubuntu package, therefore we can install it like this:
aptitude install apache2
Now direct your browser to http://192.168.0.100, and you should see the Apache2 placeholder page (It works!):
Apache's default document root is /var/www on Ubuntu, and the configuration file is /etc/apache2/apache2.conf. Additional configurations are stored in subdirectories of the /etc/apache2 directory such as /etc/apache2/mods-enabled (for Apache modules), /etc/apache2/sites-enabled (for virtual hosts), and /etc/apache2/conf.d.
4 Installing PHP5
We can install PHP5 and the Apache PHP5 module as follows:
aptitude install php5 libapache2-mod-php5
We must restart Apache afterwards:
/etc/init.d/apache2 restart
5 Testing PHP5 / Getting Details About Your PHP5 Installation
The document root of the default web site is /var/www. We will now create a small PHP file (info.php) in that directory and call it in a browser. The file will display lots of useful details about our PHP installation, such as the installed PHP version.
vi /var/www/info.php
<?php
phpinfo();
?>
Now we call that file in a browser (e.g. http://192.168.0.100/info.php):
As you see, PHP5 is working, and it's working through the Apache 2.0 Handler, as shown in the Server API line. If you scroll further down, you will see all modules that are already enabled in PHP5. MySQL is not listed there which means we don't have MySQL support in PHP5 yet.
6 Getting MySQL Support In PHP5
To get MySQL support in PHP, we can install the php5-mysql package. It's a good idea to install some other PHP5 modules as well as you might need them for your applications. You can search for available PHP5 modules like this:
aptitude search php5
Pick the ones you need and install them like this:
Now reload http://192.168.0.100/info.php in your browser and scroll down to the modules section again. You should now find lots of new modules there, including the MySQL module:
7 phpMyAdmin
phpMyAdmin is a web interface through which you can manage your MySQL databases. It's a good idea to install it:
aptitude install phpmyadmin
You will see the following questions: Web server to reconfigure automatically:<-- apache2 Configure database for phpmyadmin with dbconfig-common?<-- No
Afterwards, you can access phpMyAdmin under http://192.168.0.100/phpmyadmin/:
This is a how-to for setting up a web development environment easily. This guide will install the XAMPP lampp stack into /opt, setup an easy way to start it up and shut it down, and link a folder in your home directory to the webserver.
WARNING
This guide is aimed at a development environment only and should not be used as a public webserver. To setup a public webserver follow the directions on the Ubuntu wiki https://help.ubuntu.com/community/ApacheMySQLPHP
As this is Ubuntu, all the major parts of a typical web server are included (in the main repo, or on the Ubuntu Server CD) and this is a great way to setup a server. The ubuntu developers have prepared a great web server and have made the process as seemless as possible.
But what if even the official way is still to complicated? What if you just want a quick web server for development?
Fortunately there is the XAMPP project: http://www.apachefriends.org/en/xampp.html. The XAMPP project bundles Apache, PHP4 & 5, Perl, mySQL, and a bunch of other utilities/applications into an simple package for Mac OSX, Windows, Solaris, and Linux. Obviously this HOWTO only deals with the linux version.
For those of you with already existing Apache/mySQL/php installations it installs everything into /opt so it doesn't conflict with any other installation, and it is completely setup and ready to run.
Paste the following into the open file and save and exit.
[Desktop Entry]
Comment=Start/Stop XAMPP
Name=XAMPP Control Panel
Exec=gksudo "python /opt/lampp/share/xampp-control-panel/xampp-control-panel.py"
Icon[en_CA]=/usr/share/icons/Tango/scalable/devices/network-wired.svg
Encoding=UTF-8
Terminal=false
Name[en_CA]=XAMPP Control Panel
Comment[en_CA]=Start/Stop XAMPP
Type=Application
Icon=/usr/share/icons/Tango/scalable/devices/network-wired.svg
"XAMPP Control Panel" will show up in your applications menu under Internet. Use the Alacarte Menu Editor to move it around.
Test to see if XAMPP is running
Once XAMPP is up and running open firefox and go to: http://localhost/
You should see the XAMPP test page:
Location of files and uploading
XAMPP by default uses /opt/lampp/htdocs as the root web directory. The easiest way to start working on files is to link a folder in your home directory into this directory.
My user name is peter so I have /home/peter/public_html linked to /opt/lampp/htdocs/peter. So if I navigate to http://localhost/peter/ I get a listing of all the files/folders in that directory. (As long is there isn't a index.php/html/etc file)
To set this up, run in a terminal:
Make public_html directory in home directory:
mkdir ~/public_html
Link to /opt/lampp/htdocs
sudo ln -s ~/public_html /opt/lampp/htdocs/$USER
Now any files and folders you place in ~/public_html will be published to your personal webserver.
ProFTPD uses the password "lampp" for user "nobody".
PhpMyAdmin is accessible via network.
Examples are accessible via network.
MySQL and Apache running under the same user (nobody).
This doesn't leave your whole system wide open, but someone could hack your XAMPP installation, so be wary.
To fix most of the security weaknesses open a terminal and run:
This is an example to build Web Server. Install Apache for it. In addition to do it, And it's also neccessary to configure router so that TCP and UDP packets to 80 and 443 can pass through. [1] Install httpd [root@www ~]# yum -y install httpd # remove test page [root@www ~]# rm -f /etc/httpd/conf.d/welcome.conf # remove test page [root@www ~]# rm -f /var/www/error/noindex.html # create a link for Perl [root@www ~]# ln -s /usr/bin/perl /usr/local/bin/perl [2] Configure httpd. [root@www ~]# vi /etc/httpd/conf/httpd.conf
# line 44: change ServerTokens Prod
# line 74: change to ON KeepAlive On
# line 251: Admin's address ServerAdmin root@server.world
# line 265: server's name ServerName www.server.world:80
# line 320: change (disable Indexes) Options FollowSymLinks ExecCGI
# line 327: change AllowOverride All
# line 391: add file name that it can access only with directory's name DirectoryIndex index.html index.cgi index.php
# line 524: change ServerSignature Off
# line 747: make it comment #AddDefaultCharset UTF-8
# line 778: uncomment and add file-type that apache looks them CGI AddHandler cgi-script .cgi .pl
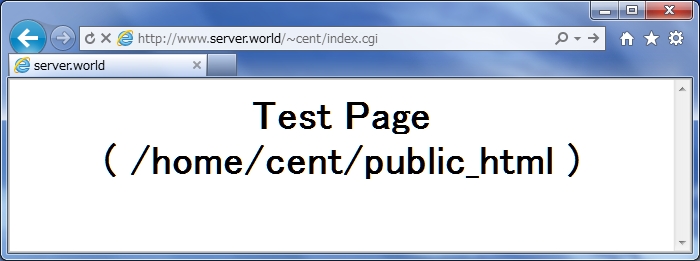
[root@www ~]# /etc/rc.d/init.d/httpd start Starting httpd: [ OK ] [root@www ~]# chkconfig httpd on [3] Make HTML test page and access to it with web browser. It's OK if following page is shown. [root@www ~]# vi /var/www/html/index.html Test Page
[4] Make CGI test page and access to it with web browser. It's OK if following page is shown. [root@www ~]# vi /var/www/html/index.cgi
Configure for SSL that is installed in section (1). I made a Certification File for SSL by myself in this example, but if you use server for bussiness, It's better to buy and use a Certification File from CA like verisign.com. [root@www ~]#
cd /etc/pki/tls/certs
Generating RSA private key, 1024 bit long modulus
.................................................. ....++++++
.............++++++
e is 61251 (0x10001)
Enter pass phrase:
// input pass phrase
Verifying - Enter pass phrase:
// verify
[root@www certs]#
// it's troublesome to input pass phrase always, so remove it from private key
You are about to be asked to enter information that will be incorporated
into your certificate request.
What you are about to enter is what is called a Distinguished Name or a DN.
There are quite a few fields but you can leave some blank
For some fields there will be a default value,
If you enter '.', the field will be left blank.
-----
Country Name (2 letter code) [GB]:
JP
State or Province Name (full name) [Berkshire]:
Hiroshima
Locality Name (eg, city) [Newbury]:
Hiroshima
Organization Name (eg, company) [My Company Ltd]:
Server Linux
Organizational Unit Name (eg, section) []:
IT Solution
Common Name (eg, your server's hostname) []:
www.server-linux.info
Email Address []:
root@server-linux.info
Please enter the following 'extra' attributes
to be sent with your certificate request
A challenge password []:
// Enter with empty
Starting httpd:
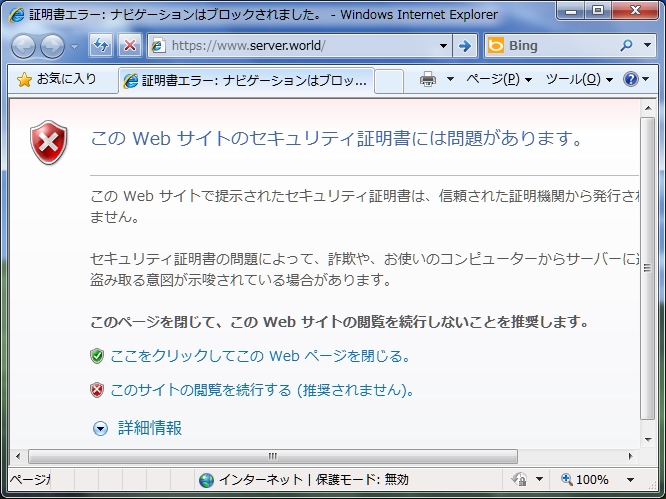
[ OK ] Access to the page that is made in section (2) with https. Following window is shown because Certification File is not by CA. Click Ok to proceed.
Image test
Completed to access. However, I think this is not so useful because always warning window is shown and visitors can not easily trust the server.
Here is an example to configure Apache. I set it that users can open to the public their Web site and can execute CGI in any directories. ( SSI is disabled because it's not used so often ) [root@www ~]# vi /etc/httpd/conf/httpd.conf
ServerTokens Prod // line 44: change
KeepAlive On // line 74: change to ON
ServerAdmin root@server-linux.info // line 250: Admin's address
ServerName www.server-linux.info:80 // line 264: server's name
Options FollowSymLinks ExecCGI // line 319: change (disable Indexes)
AllowOverride All // line 326: change
# UserDir disable // line 354: make it comment
UserDir public_html // line 361: make valid
// line 369 - 380 : remove # and make valid
AllowOverride All // change
Options ExecCGI // CGI enabled
Order allow,deny Allow from all
Order deny,allow Deny from all
// line 390: add file name that it can access only with directory's name
DirectoryIndex index.html index.cgi index.php
ServerSignature Off // line 523: change # AddDefaultCharset UTF-8 // line 746: make it comment // line 777: make valid and add file-type that apache looks them CGI AddHandler cgi-script .cgi .pl [root@www ~]# /etc/rc.d/init.d/httpd start Starting httpd: [ OK ] [root@www ~]# chkconfig httpd on Make HTML test page and Make sure apache is working. It's OK if following page is shown. [root@www ~]# cd /var/www/html [root@www html]# vi index.html Test Page
Make CGI test page and Make sure apache is working. It's OK if following page is shown. [root@www ~]# cd /var/www/html [root@www html]# vi index.cgi #!/usr/local/bin/perl print "Content-type: text/html\n\n"; print <<"EOM"; CGI Test Page [root@www ~]# chmod 705 index.cgi Make PHP test page and Make sure apache is working. It's OK if following page is shown. [root@www ~]# cd /var/www/html [root@www html]# vi index.php print Date("Y/m/d"); ?>




 RSS Feed (xml)